I had a need to parse documents and create a “text” version of their content for inserting into a dynamics multi-line text attribute. The idea was that the content would be used for search as well as “quick reading.”
Java’s tika library is highly regarded for multi-document parsing, of many types, not just Microsoft Office document but also PDFs etc.
Since the functionality to parse a document and update an entity’s attribute is on a form, we have a few choices to do this:
- Create a web site that we hit with a dynamics crm webhook
- Create a web server that allows us to call REST calls and extract the text.
- Don’t use java and write a plugin to do this.
- Use MS flow with some type of text extraction service.
- Use some other existing plugin/appsource solution.
Dynamics is clearly following the trend of the MS cloud to pull processing out of the server and put it into microservices. Significant innovation is occurring in the azure cloud vs data integration on the dynamics platform. Dynamics will catch up at some point, but for now its better to pull things off platform if its easy.
It is easy (and secure) to use to provide a REST service callable from a form’s web page through javascript. So let’s do something easy (I spent a few hours on this) and use azure functionapps.
An azure functionapp is a single function you provide on a pay-as-you-go, per call basis to run a function. That function itself can pretty much do anything as long as it runs within its governor limits (see the functionapp documentation for governor limits).
In our case, our function should just parse the document provided to it in the REST payload and return the parsed text. Since its functionapps on azure, it is easily secured and accessed from any javascript application we want. We will not cover security in this post, but its easy to adjust the CORS policy and use a javascript dynamics web resource to secure the web service. We could also add a token based header/query parameter. This makes functionapps ideal for accessing off platform processing while still securing access credentials. For example, if you want to access the MS graph from within Dynamics, you can make the function call using functionapps vs using a plugin with embedded security parameters (or some other standard tricks). Functionapp security credentials are protected behind CORS, security tokens and other more robust data management models.
Here’s a few links on functionapps that’s relevant:
- Overall documentation root for functionapps
- https://docs.microsoft.com/en-us/azure/azure-functions/functions-create-first-java-maven
- https://docs.microsoft.com/en-us/azure/azure-functions/functions-reference-java
- https://docs.microsoft.com/en-us/azure/azure-functions/set-runtime-version
To make this more interesting, instead of using java, we’ll use scala and we’ll create a fat jar for the service since its so easy to create.
The key thing to remember is that a functionapp is really a set of functions grouped together in an “application” service that runs like any other web program. In fact it runs much like the old-school CGI programs on web servers from the 1980s. A call comes in, a function within an application (regardless of the language or execution model) is run and the results are returned to the caller. You can think of a functionapp as a function with some programming code that runs on a "virtual’ server that only runs when the function endpoint is called. It’s called serverless computing because you never allocate a server, its handled for you, all you need to do is organize a hierarchy of files that represent the function, the functions “configuration” and the related programming code.
The functionapps are organized on the “server” like the following directory tree:
- wwwroot
- func1: The function to create, you can have multilpe.
- function.json: The configuration that describes how to run the function e.g. run a .net/nodejs/java rpgoram.
- blah.jar: In this case, a java jar file that contains the JVM bytecode. If this was a nodejs program we would have a “index.js” type file that contains our function’s code.
- func2: Another function bundled under the same “functionapp”
- func1: The function to create, you can have multilpe.
Here’s our development checklist:
- In the azure portal, create a new functionapp called functionappparse.
- Underneath this functionapp we will create a single function called parse.
- Create its a javascript/node app. It doesn’t matter what you create as we will swap in the configuration and programming files from our scala project.
- Set the functionaparse>Application Settings>FUNCTIONS_EXTENSION_VERSION to beta. “beta” is needed to get the 2.x functionapp execution engine that supports the JVM. If you are using javascript or C# you can leave it on the default.
- Set the CORS to the dynamics servers of interest so that only the CRM servers we care about can access the app.
- Set the app to only allow ftps (the s!) deployment so that clear text ftp is not allowed.
- Create a scala app that uses the azure annotations to create our “function” to call.
- Create the function’s configuration.
There is a maven archetype (project template) that you can use to create your project but I found that it did not work and it’s too hard to use. Instead, we’ll just create a simple scala project that creates a fat jar and push the fat jar using “lftp” (on linux) to copy the function files to the “serverless server.” This is called “ftp” deployment and is a standard “deployment” mechanism for websites. The ftp site uses ftps which is not the same thing as sftp.
Functionapp
Set up a functionapp, by following the azure documentation. Create a function, say called “parse”, as a standard HTTP endpoint function that is called whenever you hit the HTTP endpoint.
Create the functionapp called functionappparse. You will want to also create a function based on javascript/nodejs to create the shell of the function.
You can use the “app services editor” (a separate editor available in the portal under your functionapps settings) to rename, delete or move around files on the “serverless” server. While there is no web server per se, there is filespace allocated for our functionapp files.
The key insight is that each function is just a plain directory under the wwwroot directory. The name of the directory indicates the function name for functionapp management although you can name the actual function called anything you want per the function.json configuration data. Within each directory is the function.json configuration file and then whatever associated “function execution” files are needed–javascript files or jars, etc.
The program execution files can be located anywhere in the overall “functionapp site” as long as the path name to the execution file can be found. You might push a jar file that has several functions to the topmost directory and have the function config parameter point to “…/something-one-level-up.jar”. Just be aware that you may run into execution issues if you are not careful e.g. nodejs node_modules directories.
The app we want is
- anonymous: No “security code” is needed to call it. An anonymous function does not need a key in the header to be called. Since we are only calling this from dynamics and we use CORS and SSL, we should be fine with an anonymous function.
- Use a standard mode.
These are all found on the “integrate” config page:
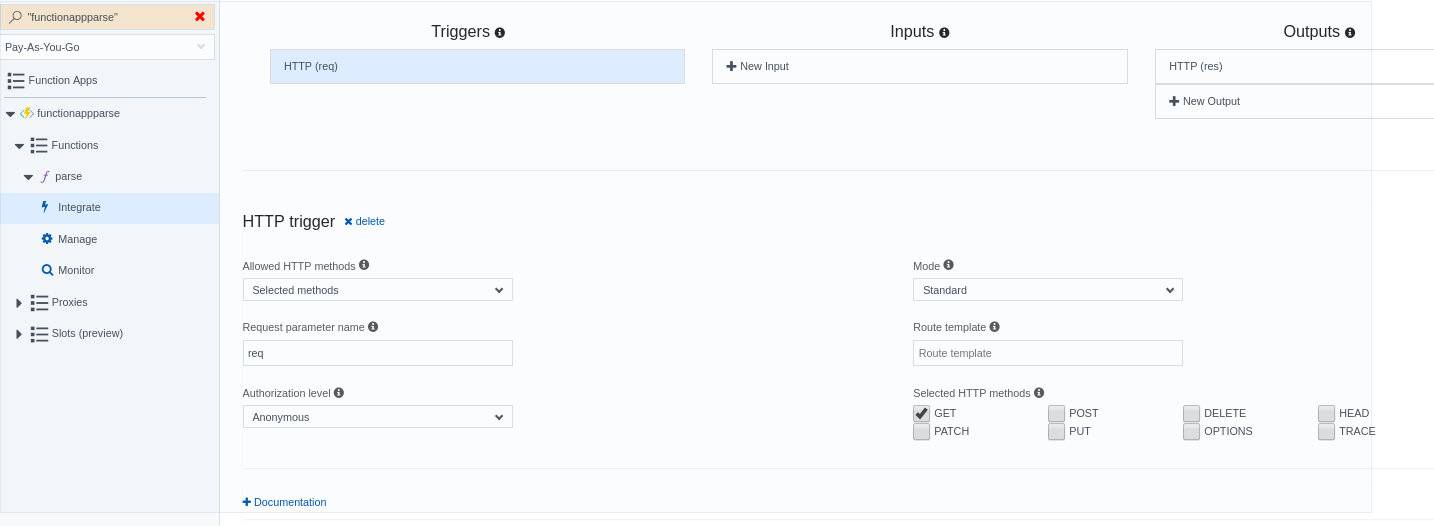
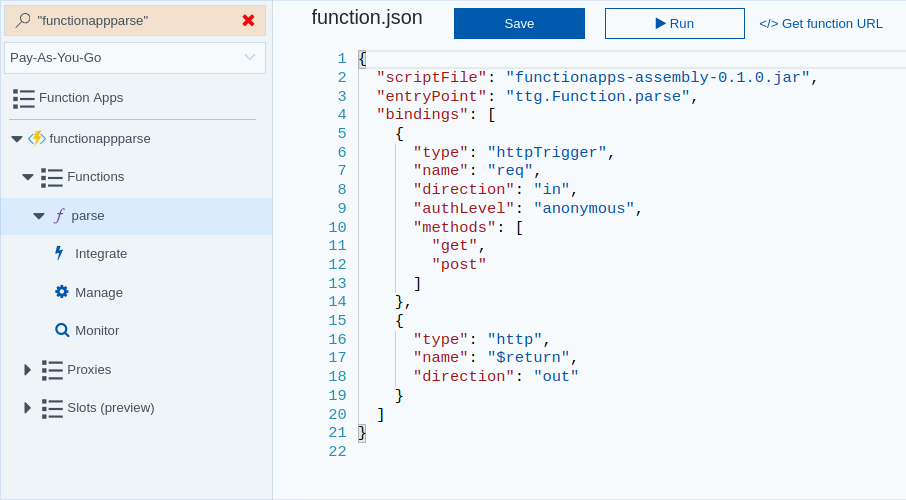
After going through the config for a javascript http endoint, you’ll find that by looking in the App Services editor, you have something like these two pictures:
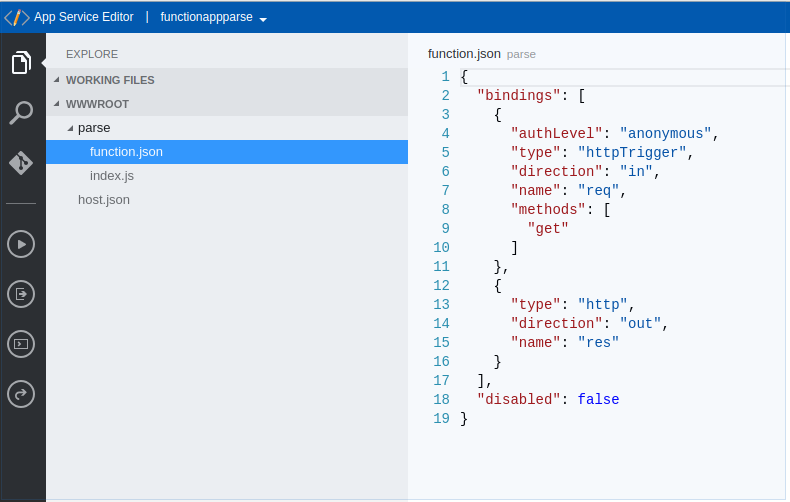
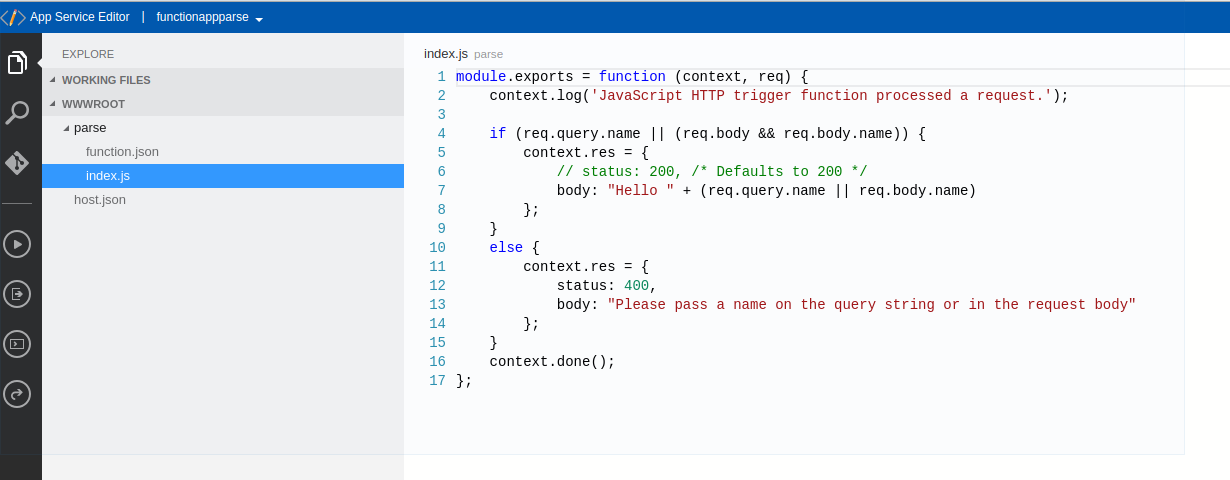
We will be replacing the javascript function with a java jar file.
Ultimately, our function.json will look like:
{
  "scriptFile": "functionapps-assembly-0.1.0.jar",
  "entryPoint": "ttg.Function.parse",
  "bindings": [
    {
      "type": "httpTrigger",
      "name": "req",
      "direction": "in",
      "authLevel": "anonymous",
      "methods": [
        "get",
        "post"
      ]
    },
    {
      "type": "http",
      "name": "$return",
      "direction": "out"
    }
  ]
}
The bindings map function parameters to request data or output values to functionapp responses. You can also inject other values into the function parameters, for example, the values from an azure table. Reviewing the options available in the portal allow you to identify and obtain the needed json for each type of additional input you may want. Environment variables, a mechanism that is good enough for usernames/passwords, can be placed into the host.json file and accessed through normal java environment access APIs.
The scriptfile indicates the program that will be run by the server “loader” that is specific to each “language/execution” model. In this case its a .jar file so a JVM “loader” will be used to load the jar, find the function name via reflection, and call it when the event occurs. The scriptFile entry indicates the jar is in the same directory as the function.json file, but as long as the path in scriptFile is set correctly, you could locate your functionapp anywhere in the filespace.
You can literally cut and paste this configuration into the function.json file and restart the functionapp using the “restart” button. If you were to run this, it would error out because we have not uploaded the fat jar functionapps-assembly-0.1.0.jar to the server yet. That’s next.
Scala Project
We need to create a scala project that uses tika and adds in the function entry point used by azure functionapps. We want to create an output fat jar called functionapps-assembly-0.1.0.jar that includes everything needed. It will be large and it will be easy to move around (see the deployment section below).
Here’s what we need:
- build.sbt
- project/build.properties, project/plugins.sbt
- functionapps/src/main/scala/parsedoc.scala
That’s all the source we need. We won’t cover all of the contents but show the critical parts. Contact me for a full example (I’ll try to get time to create a sbt g8 template project for it).
Here’s the project definition in our build.sbt:
le circeVersion = "0.9.3" // json processing
lazy val functionapps = project
  .settings(baseCommonSettings)
  .settings(
    .settings(libraryDependencies ++= Seq(
    "io.circe" %% "circe-core",
    "io.circe" %% "circe-generic",
    "io.circe" %% "circe-parser",
    "io.circe" %% "circe-optics",
  ).map(_ % circeVersion))
  .settings(libraryDependencies ++= Seq(
    ("org.apache.tika" % "tika-core" % "1.18")
      .exclude("commons-logging","commons-logging-api"),
    ("org.apache.tika" % "tika-parsers" % "1.18")
      .exclude("commons-logging","commons-logging-api"),
    ("com.microsoft.azure" % "azure-functions-java-core" % "1.0.0-beta-2")
      .exclude("commons-logging","commons-logging-api"),
  ))
  .settings(
    assemblyMergeStrategy in assembly := {
      case "META-INF/blueprint.handlers" => MergeStrategy.first
      case "META-INF/cxf/bus-extensions.txt" => MergeStrategy.first
      case "mozilla/public-suffix-list.txt" => MergeStrategy.first
      case PathList("org", "apache", "commons", "logging", xs @ _*) => MergeStrategy.first
      case x =>
        val oldStrategy = (assemblyMergeStrategy in assembly).value
        oldStrategy(x)
    }
  )
We have some boilerplate here to help remove the conflicts that exist when we create a fat jar. The issue is that by slamming together a large number of jar files into a single jar we have some conflicts because of some packaging badness on the part of some jars. The merge strategy clauses and excludes helps us work around that.
Here’s the plugins:
// project/plugins.sbt
addSbtPlugin("com.eed3si9n" % "sbt-assembly" % "0.14.6")
If you use the maven template described in the links above you get a java file that looks like:
package ttg; // for The Trapelo Group, not in the mvn template

import java.util.*;
import com.microsoft.azure.serverless.functions.annotation.*;
import com.microsoft.azure.serverless.functions.*;

/**
 * Azure Functions with HTTP Trigger.
 */
public class Function {
    /**
     * This function listens at endpoint "/api/hello". Two ways to invoke it using "curl" command in bash:
     * 1. curl -d "HTTP Body" {your host}/api/hello
     * 2. curl {your host}/api/hello?name=HTTP%20Query
     */
    @FunctionName("hello")
    public HttpResponseMessage<String> hello(
            @HttpTrigger(name = "req", methods = {"get", "post"}, authLevel = AuthorizationLevel.ANONYMOUS) HttpRequestMessage<Optional<String>> request,
            final ExecutionContext context) {
        context.getLogger().info("Java HTTP trigger processed a request.");

        // Parse query parameter
        String query = request.getQueryParameters().get("name");
        String name = request.getBody().orElse(query);

        if (name == null) {
            return request.createResponse(400, "Please pass a name on the query string or in the request body");
        } else {
            return request.createResponse(200, "Hello, " + name);
        }
    }
}
Now we just need to replace the java file with a scala file (in the scala sources directory) that has the entry point and calls the tika parse function.
package ttg

import java.util._
import java.io._
import com.microsoft.azure.serverless.functions.annotation._
import com.microsoft.azure.serverless.functions._

import scala.util.control._
import cats._, cats.data._, cats.implicits._

import org.apache.tika, tika._, tika.metadata._
import _root_.io.circe._, _root_.io.circe.parser.{parse => parsejson}
import _root_.io.circe.optics.JsonPath._
import _root_.io.circe.generic.auto._, _root_.io.circe.syntax._

case class ParseSuccess(
  /** Text with escaped whitespace characters. */
  content: String
)

class Function {

  val tika = new Tika()

  def extract(base64: String, filename: String) = {
    val decodedBytes = Base64.getDecoder().decode(base64)
    val inputStream = new ByteArrayInputStream(decodedBytes)
    val m = new Metadata()
    m.add(TikaMetadataKeys.RESOURCE_NAME_KEY, filename)
    Either.catchNonFatal(tika.parseToString(inputStream, m))
  }

  @FunctionName("parse")
  def parse(
    @HttpTrigger(name = "req", methods = Array("get", "post"), authLevel = AuthorizationLevel.ANONYMOUS)
      request: HttpRequestMessage[Optional[String]],
    context: ExecutionContext): HttpResponseMessage[String] = {

    context.getLogger().info("HTTP trigger: Parse a document.")
    val args: ValidatedNel[String, (String, String)] =
      parsejson(request.getBody().orElse("{}")) match {
        case Left(pfailure) => Validated.invalidNel(s"Malformed body: ${pfailure.show}")
        case Right(json) =>
          (
            root.filename.string.getOption(json).toValidNel[String]("No filename field provided."),
            root.content.string.getOption(json).toValidNel[String]("No content field provided.")
          ).mapN{ (f,c) =>  (f,c) }
      }
    context.getLogger().info(s"args: $args")
    args match {
      case Validated.Valid((f, c)) =>
        extract(c, f) match {
          case Right(extracted) =>
            request.createResponse(200, Json.obj("content" -> Json.fromString(extracted)).noSpaces)
          case Left(t) =>
            request.createResponse(422, Json.obj("errors" -> Json.arr(Json.fromString(t.getMessage()))).noSpaces)
        }
      case Validated.Invalid(msgs) =>
        request.createResponse(400, Json.obj("errors" -> Json.fromValues(msgs.toList.map(Json.fromString))).noSpaces)
    }
  }
}
To create the fatjar, run the sbt command functionapps/assembly. The output is a very large, single file at functionapps/target/scala-2.12/functionapps-assembly-0.1.0.jar.
The java annotations are there even though in our case they are unneeded. They are used by the maven azure plugin to generate function.json automatically. However, since we are using sbt and hand writing function.json, they are unused and you could remove them.
Deployment
We deploy the fat jar using lftp on linux. You obtain the userid and password in the publishing settings off the main configuration page for the functionapp.
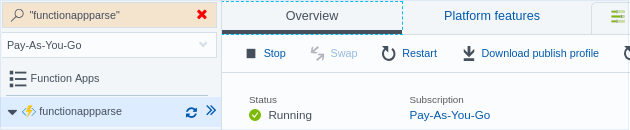
Once you download it you can look for the ftp settings and look at the file. We have used xml_pp -i on the file to make the downloaded publish settings more readable. (Note: This endpoint no longer exists and I have elided the passwords).
<publishData>
  <publishProfile SQLServerDBConnectionString="" controlPanelLink="http://windows.azture.com" destinationAppUrl="http://functionappparse.azurewebsites.net" hostingProviderForumLink="" msdeploySite="functionappparse" mySQLDBConnectionString="" profileName="functionappparse - Web Deploy" publishMethod="MSDeploy" publishUrl="functionappparse.scm.azurewebsites.net:443" userName="$functionappparse" userPWD="...big long string..." webSystem="WebSites">
    <databases/>
  </publishProfile>
  <publishProfile SQLServerDBConnectionString="" controlPanelLink="http://windows.azure.com" destinationAppUrl="http://functionappparse.azurewebsites.net" ftpPassiveMode="True" hostingProviderForumLink="" mySQLDBConnectionString="" profileName="functionappparse - FTP" publishMethod="FTP" publishUrl="ftp://waws-prod-blx-265.ftp.azurewebsites.windows.net/site/wwwroot" userName="functionappparse\$functionappparse" userPWD="...big long string..." webSystem="WebSites">
    <databases/>
  </publishProfile>
</publishData>
Grab the last username and password since it’s the FTP publish location.
Now all you need to do is use lftp:
> cd functionappparse # go to your scala project directory
> lftp waws-prod-blx-265.ftp.azurewebsites.windows.net
> login functionappparse\$functionappparse ...big long string...
> cd site/wwwroot/parse
> put functionapps/target/scala-2.12/functionapps-assembly-0.1.0.jar
You could also use the azure browser to manipulate the function.json file and upload the fatjar manually.
That’s it!
Test it
You may want to restart the functionapp and then call then service from your javascript. To find the “url” to call access the “</> Get function URL” link found in he function overview page:
The “copy” it to the selection buffer on your computer:
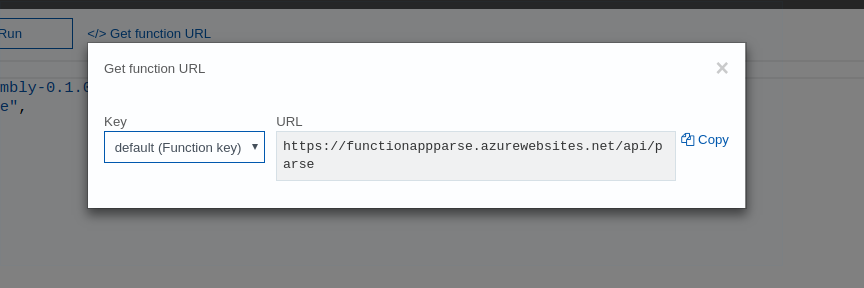
Notice that because we are using an anonymous function, there is no “code” query parameter to use with our CLI curl command or javascript call once we write that function for dynamics.
To test it, you can push a .docx encoded file to the web service using curl or you can use the azure portal.
Let’s use curl in this test example. You can encode a file in linux using the command base64 -w 0 blah.docx | xsel. The xsel sends the contents to the cut buffer so you can cut and paste the encoded file into a payload.json file you create in a text editor:
{
 "filename": "blah.docx",
 "contents": "...base64 encode remember no hardnewlines in the text area allowed..."
}
Then call it using curl. If you navigate to the functionapp and select the specific function, you can copy the URL to call and cut and paste it. You can use any REST tool including something like Postman.
curl -X POST https://..../parse -d @payload.json
and the result:
{"content":"Text from a word docx.\nThis was parsed!\n"}
If you use the “Run” button in the azure portal functionapp bowser, you get the same result:
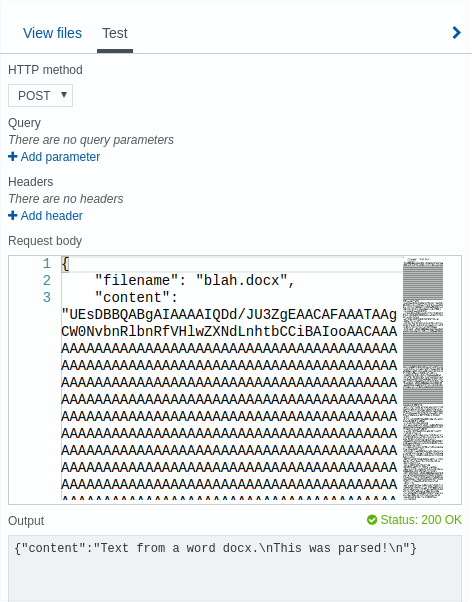
Since this is a serverless function, there is not server to log into and obtain the logs. You can obtain the logs by looking at the dashboard in the azure portal. If you get a 404 error when you call your function, you may not have set the platform runtime engine to “beta” vs the default of “~1”. You may need to restart the functionapp if you upload a new .jar file so be aware of your development lifecycle and functionapps caching.
